How to plan a successful corporate video shoot
Whether you’re telling stories about your people, services or products; or you’re providing coverage of an event or conference, there’s a strong possibility that you will be using video in your B2B marketing plans in 2018.
The increased use of video means that more marketing teams are now looking to produce videos in-house. But getting the slick and professional finish can be tricky.
We have a number of former broadcast journalists in our team, so we know a thing or two about producing video under a variety of different and challenging conditions.
Plan, plan, plan.
A successful video shoot takes a lot of detailed planning.
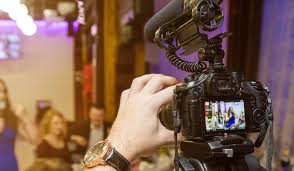
Even a short and simple social video shot on an iPhone can involve a complex production process. There can be a lot of people and kit involved to get the high-quality finish needed.
There’s a lot to think about. Do you have the right equipment to gather quality footage? What will the edit entail and how will you record high-quality audio? It’s easy to get it wrong if you’re not aware of the pitfalls, so here are our tips to help you make your video production a success.
Set your aims and objectives
Before you even think about picking up a camera be clear about what you want to achieve. Think about how your video will be used. This will have a big influence on how you shoot and edit the video.
Do you need to leave space in the shot to add text for a social video? If you’re planning to screen your video at an event, how big will the screen be? If it’s huge then your smartphone camera may not be up to the job.
What are the key messages that you need to get across? This will inform the questions you ask in interviews and the additional shots you need to film to visualise your story.
How long will the video be? You’ll want to make sure you shoot enough footage, but not so much that you have to spend days editing it.
Define your story
In the best videos the pictures do most of the heavy lifting in terms of telling the story – and if you don’t know the story you won’t know what to shoot.
Write a rough script in advance – but be prepared to revise it as the story can change during the video shoot.
Create a shot list or a storyboard by working through the video in your head. What are the key images you need for your video?
Do a recce
If you’re filming at a specific location, make sure you check it out before the shoot. Producers call this a recce. It’s not always possible – but if you can – you should. The location can make or break your shoot.
Things to look out for:
- What noises can you hear? The hum of air conditions, overhead aircraft, trains, church bells? These can all ruin the sound quality of your video.
- Will the position of the sun make or break your shot? Have you checked at the time you’re due to shoot? Do you know when to expect the sun to rise and set?
- Is it going to rain/snow/blow a gale? If so, you may need an alternative location.
- Do you have access to a power supply to keep kit running – or charge batteries?
- Do you have permission for access AND to film?
- Will the lovely empty event space be totally rammed on the day of the shoot?
- Is your location safe for everyone involved?
Make a kit list
There can be a lot of kit involved in a video production, and if you forget something it will compromise your shoot. Memory cards are small and easily overlooked, a lens cleaning kit has saved the day so many times for me.
Make up a detailed list and tick off every item as you pack it. Make sure each item is in a ready-to-use state. Are your batteries charged, are your memory cards empty and correctly formatted for the camera you are using?
It’s often worth having a small supply of makeup – a basic powder for all skin tones to help dab away the shine from nervous people in the interview chair.
Prepare a detailed call sheet
A call sheet is vital to a successful video production. It tells everybody involved where they have to be and when. Make sure you include contact details for everybody involved and contact details for the production office.
A call sheet lays out everybody’s roles and responsibilities. Include a list of who is bringing what kit, what is to be filmed and at which location, with dates and times. You should include details of local public transport links and car parks.
It is important to include details of local emergency services and hospital accident and emergency departments. The production insurance policy should be attached to the call sheet. Hopefully you won’t need these, but you’d rather be prepared for it if you do.
Tips For Shooting A Professional Looking Video
Create a great video storyboard
Great videos don’t just happen, the production team and videographer make them happen. From the overall look and feel to the tiny details in each shot, a professional looking video is meticulously planned.
Creating a video storyboard is a vital first step in the video production process and they are an extremely useful tool for creating professional looking videos you can’t wait to share. A video storyboard is a graphic representation of how your video will unfold, shot by shot. Beneath each picture are notes about the shot style, what is going on in the scene, what is being said etc. If your video has sound you are also going to need to write a script to support your video storyboard.
Shoot a steady video
Wobbly or unsteady camerawork is nauseating and frustrating to watch, it’s definitely not synonymous with a professional looking video. A tripod, or smartphone video mount, is an obvious and credible choice for creating a steady video shot, and they are easy to manoeuvre in and out of multiple positions.
If you are working in a tight or awkward space, and the angle you want can’t be captured via a tripod or mount, you can hold your camera whilst leaning your body on something solid like a wall or the ground. Always keep your breathing slow and steady when you are filming.
Use plenty of light
Natural light is great for video – Bright videos look glossy and professional. Dark, grainy videos do not. The best source of light when shooting a video is natural sunlight, whether that is through a large window or outdoors. However, try to schedule your filming during the morning or late afternoon when the light is softer and more flattering, midday sunshine tends to be very bright and harsh as the light shines down from overhead. If you do shoot in the middle of the day try to find a partly shaded area for that softer light effect.
Creating good light for video indoors – Creating a good light source for videos indoors takes a little more skill. It is possible to create enough light using a large bright, fluorescent lamp or two if you are shooting a simple scene E.g. talking heads to camera or a selfie video. Practise manoeuvring your light source so that you cast zero or minimal shadows on your subject, this will make your video feel bright, open and professional.
Pro Tip! Always position your light source higher than the subject’s eyeline, if you are filming a person, and never directly above their head or the object. Start casting the light(s) straight above the camera and then manoeuvre into the perfect position from there, having two light sources at either side of the camera will create less shadows and a more professional looking video.
Capture crisp, clear audio
Indistinct, muffled audio is not going to encourage many views past the first couple of seconds of your video. Crisp, clear audio is a must whether it a music overlay or ‘in video’ audio. To capture clear sound from your subject(s) a good microphone is an essential piece of professional looking video kit. Invest in the best that you can afford so that it works great and lasts a long time. During filming your microphone needs to be as close to the subject as possible and consider using a pop filter to eliminate blips and crackles.
If you’re filming indoors a silent shoot is easier to control but outdoors be aware of traffic, birdsong etc.
Shoot from creative angles
If you’re hosting a business event or dinner where everyone is seated, you may have to get creative with composition to get a variety of images. Utilize interesting angles and perspectives so the shot isn’t so utilitarian.
“To keep the photos interesting, keep angles interesting. If there are floral arrangements, you can shoot between them. If it’s at a restaurant, go outside and take a picture looking in through the window. Look at the event not just as a participant, but from an outsider’s perspective, to get a broader sense of the day.
Rely on natural lighting as much as possible
Try to take advantage of the natural lighting in your venue, and avoid using flash (especially on-camera flash). Where possible, capture natural lighting, and avoid artificial lighting and flashes. “Unnatural light makes your image inherently feel like a photograph, and takes viewers out of the moment.” If you really need to use flash, consider investing in event photography equipment like an off-camera flash.
If you do need flash and are taking shots of attendees, have them turn slightly to the side so they’re not facing the camera head-on. This will reduce red-eye in your pictures, because that’s caused when light enters the subject’s eyes at a right angle.
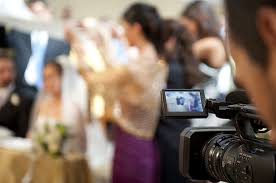
Wedding Photography Tips
Here are some of the best wedding photography tips to help you succeed in taking the best wedding ceremony and family photos at your next event.
1. Assist a Professional
Try reaching out to a professional wedding photographer before you start your own wedding photography business. They may allow you to shadow them at weddings they’ve booked, or pick their brain for advice.
You can gain hands-on experience while working alongside a seasoned professional that you can apply to other, later shoots. Some of the tips you learn may not be new to you, depending on your photography skills. But, it’s always helpful to see how other professionals in your field work to achieve the best results.
2. Test Your Camera in Advance
You’ll likely want to bring a tripod with you to use at the wedding ceremony, in addition to several camera lenses and external flashes. If the wedding you’re photographing takes place indoors, you may also need other lighting equipment. For outdoor ceremonies, you can likely get by with a bounce rather than cumbersome lights.
It’s a good idea to err on the side of caution and bring more equipment than you think you’ll need. Pack several spare batteries and memory cards so you don’t miss anything from drinks at cocktail hour to fun-filled dancing on the dance floor.
3. Pack Sufficient Accessories
As a professional photographer, making excuses for your failures doesn’t look good. So bring all of your accessories you’ll need to take great wedding photos. If you can, bring a laptop to manage the backup of your photos in real-time. This will help you avoid potential significant technological mishaps down the road, including losing photo data.
4. Photograph with a Partner
You can’t carry all your photography accessories alone. You’ll likely need a helping hand to take the best wedding photography images you can. You may also need another professional photographer to assist in managing lights, taking test shots and capturing scenes you’d otherwise miss. You can’t be everywhere at once!
Ask a wedding photographer to become your assistant in exchange for being their second in command at their next event. This trade is a smart way to stay on budget and get help from an experienced wedding photographer.
5. Pre-Plan the Shoot
Planning your shoot is just as important as the shoot itself. Make some extra time for this part of your wedding photography preparations.
You’ll want to schedule time to take multiple photos of the bride and groom in different locations. The couple will follow your instructions and defer to your professional judgment, but they may also have their own ideas for photo ops.
How you decide to pose the couple in the photos is up to you. We recommend showing your clients a manual of poses as you plan the shoot together. Let them choose the poses they want for their wedding photos, and then add them into the contract you both sign.
Depending on how comfortable your clients are in front of the camera, you may have to provide extra instruction to capture the best shot. That’s why it’s so important to be patient with the newlyweds. The more you can help them feel comfortable, the more they’ll enjoy the experience.
And remember, word of mouth advertising is essential for growing a photography business. A patient photographer is one your clients will recommend!
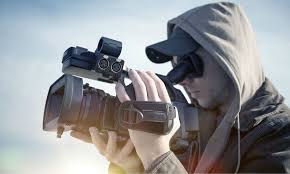
Tips For Filming Your Next Event
These Tips Will Help You Stay Organized And Make The Most Of Your Shoot.
1. Have a schedule
Shooting a huge music festival or large city event can be daunting because there is so much to cover. If you can, go over key acts, places and vendors with both the event organizer and the production team ahead of time and make sure everyone is on the same page about “must-catch” moments and highlights of the event. Figure out where you want to focus your attention throughout the day, and then make sure you have enough time to get from point a to point b.
2.—but don’t stick to it
While it’s great to have a concrete plan, don’t overload your schedule with too many time-sensitive moments—you’ll want to leave time to catch all the great beats in between. The best moments are often the ones you’ll miss if you blink. While it’s important to have a plan when you go out to shoot, you have to go where the event takes you and always be on the lookout for the right moments and the right people. Don’t be afraid to spend time veering off course if you’re catching great beats. Candid b-roll of visitor interactions, great looking food and spontaneous dance moves are what take an event video from just coverage to a cinematic time capsule of the day.
3. Keep interviews short and sweet
Getting testimonials is key to capturing the visitor experience at an event. While having a few anecdotes is great, you’ll probably end up using snappier to-the-point sound bites in your edit. Come up with a few wish-list answers and then ask simple questions that might lead to that kind of response. Avoid open-ended questions like “how are you liking your time at the festival?”. Instead, try asking something like, “what’s the coolest thing you’ve seen so far?” This makes people be specific, and by asking the same question to multiple people, you have a common theme to edit to.
4. Don’t be afraid to direct
Not all candid moments are created equal. Sometimes, you need to give people a little push to get the shot you’re looking for. It might seem unnatural at first, but asking a couple to give a quick kiss to the camera or getting a kid to bust a killer dance move can give you just the shot you’re looking for. You’re just not always going to get those moments “au naturel”. The same goes for interviews. If you want to get those short, snappy sound bites, there’s nothing wrong with guiding what people say, as long as it’s believable.
5. Gear up
When shooting an outdoor event, it’s important to strike a fine balance between having the right gear and being lightweight enough to navigate through crowds and be minimally invasive. A basic 18-55mm lens is always a good place to start because it provides versatility. On top of that, only bring what fits the event you’re shooting. Food festival? Bring that macro lens for some juicy close ups. Huge crowds? Bring a super wide angle 10-24mm to capture the huge scale of the event