Does A Residential Painting Really Have To Look At Your Home To Give You An Estimate

Things Your House Painter Wishes You Knew

House painters are responsible for changing or reapplying the color of the interior or exterior of your home, but it isn’t their job to maintain it!

You as the homeowner not only have the responsibility of caring for your walls throughout the life of the paint job, but also making sure your home is fully prepared for the paint job itself.

Check out these tips, and find out some things house painters wish you knew about painting projects:

Preparing for a paint job will take time

If you hire a professional Pennsylvania painting service, they’ll tell you that at least 1/3 of a good quality paint job should be dedicated to preparation. Proper preparation for a paint job will ensure that paint does not get anywhere it isn’t supposed to, and that edges and corners will be nice and smooth.

Do some preparation yourself

Making sure your home is paint-ready is important to a great paint job. Make sure the walls are clean, and don’t forget about corners or hard-to-reach spots. Remove switch plates and outlet covers as well.

It’s okay to ask for touch-ups

Your ideal Allentown, PA painter will encourage you to look over their work once they are finished and let them know of anything you aren’t 100% happy with. Satisfying customers is how they stay in business, after all! Your painter would rather address any issues you have while he is still at your home, rather than having to come back another time.

Let them know of competitive offers

Any painters in Allentown, PA you receive bids from want your business. If you’ve found one you really love but aren’t thrilled on the prices, call them and see if they will be willing to negotiate based on a lower bid you received from another painter.

Essential interior painting steps you won’t want your professional painter to skip

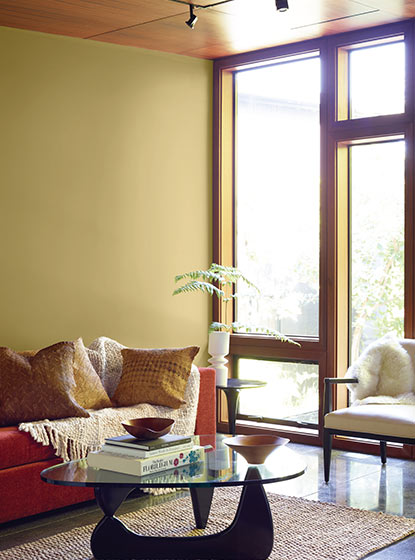
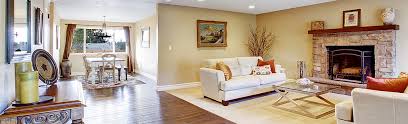
Interior painting is an absolute necessity when it comes to upgrading and revamping your home. If you are looking for a project that will easily elevate your space without breaking the bank, a new interior paint job is the way to go. You don’t have to commit to a full new interior to refresh your home; you can paint an accent wall or a ceiling to have a pleasing effect.

No matter what you’re having painted, there are certain essential interior painting steps you should make sure your professional painter follows in their painting process. If you are too busy and inexperienced to tackle an interior project the right way yourself (and who isn’t?), it is definitely in your best interest to call a professional painter to ensure that your project will be done the right way. A good professional painting company will ensure that all 5 essential interior painting steps in the painting process are done correctly every time.
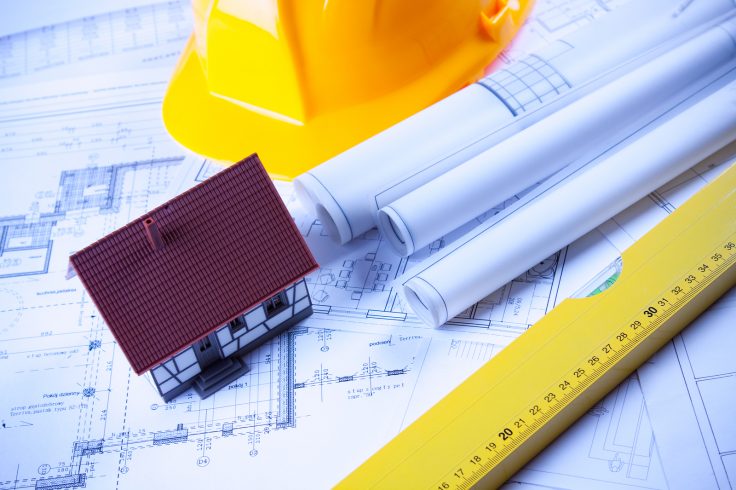
Planning

The first essential interior painting step is the planning stage. Any interior project, large or small, is going to need some planning to ensure that the project is done correctly. You will need to discuss what areas you want to paint, the color palette of the room, what colors will work well in that space, and what preferences you have on the kind of paint used.

Protecting

Another essential interior painting step is taking care to protect the objects and belongings in your space. Most DIY painters will fail to do this correctly. Once planning is done and you know what you are going to have painted, it’s very important to ensure that everything in your space is properly protected.

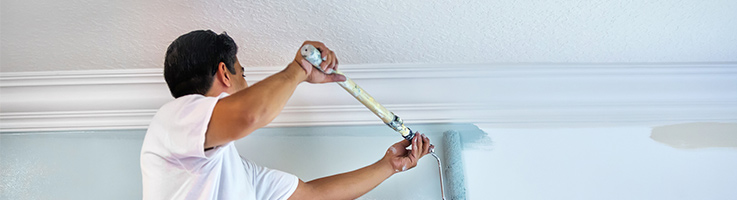
Your painter will use large pieces of plastic to cover things to keep paint from splattering all over your floors, cabinets, furniture, and anything else you want to keep free of paint splatters, drops, or spills. Since your walls, trim, or other surfaces may require sanding, your professional painter may choose to remove everything from a room or area before beginning the job.
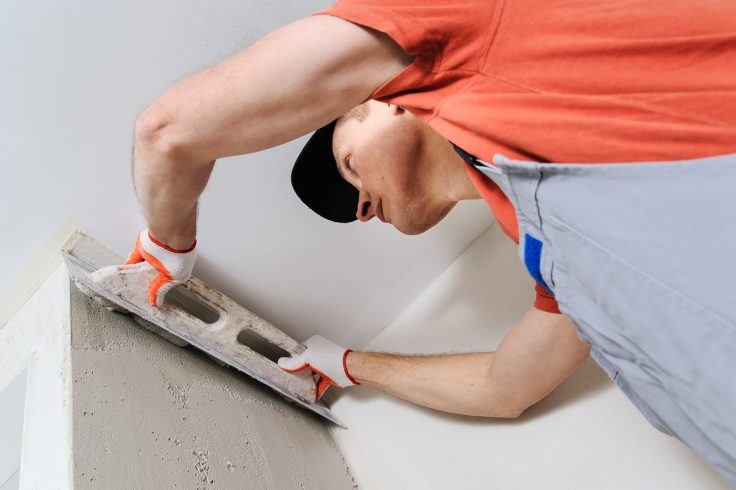
Prepping

Preparing your walls, ceilings, and other surfaces is the next step that your painting professional will take in the project. It’s an easy way, but one that you don’t want your painter to skip, to ensure that your new paint job lasts for years to come.

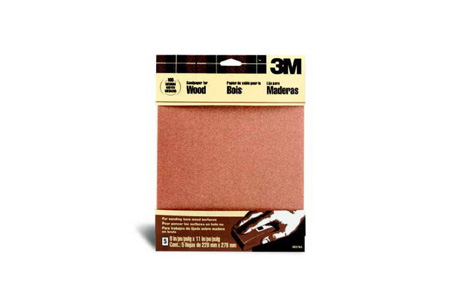
Part of preparing the room or area to be painted includes cleaning your walls before the project begins. Painting over grime and dirt will not do you any favors when it comes to the longevity of your project. Before painting, your home may need a few other things, such as sanding rough surfaces, caulking loose baseboards, or patching holes. Your professional painter will take care of these things so your walls are completely ready to paint.

 Priming

Priming is an essential interior painting step that many DIYers skip, but that professional painters do every time, for every surface. Priming a wall or ceiling is one of those steps that you definitely don’t want your professional painter to skip. Paint primer creates an even base that your paint adheres to for its best look and for longer wear. Primer also covers dark colors or uneven wall color, due to staining or other factors.

Painting

The final step in the painting process is the actual painting itself. Your professional painter will come to your home with all the supplies needed to protect, prepare, prime, and paint your interior (another benefit of hiring a professional painter, instead of trying it yourself). And there are quite a few supplies needed to successfully carry out even a small painting job.

Things To Expect From A Professional House Painter

  • Expert Color Advice

Most of us think we have great taste when it comes to home decor and choosing colors that coordinate; but in reality, most of us are wrong.  An experienced, professional house painter can help you choose colors that complement each other well and can show you how light and dark colors can change the way a room looks and feels.  In addition, a pro painter can tell you which colors are new and trendy, which is important if you’re thinking of putting your house on the market in the near future.

  • Proper Surface Preparation

No matter how expertly paint is applied to a surface, it won’t matter if the surface isn’t prepared ahead of time to receive the paint.  A professional house painter understands the process of preparing a home for painting and knows that the steps they have to take can include washing dirty walls, sanding surfaces, filling holes and cracks and applying primer.

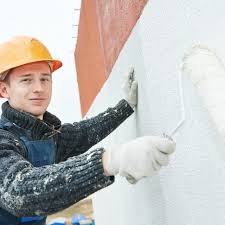
  • Painting Skill and Expertise

Painting is like golf; everyone who sees it being done thinks it’s easy to do until they try it themselves. Painting the right way requires a great deal of skill that’s acquired through years of experience painting every kind of surface and using every kind of painting technique. A skilled painter knows which types of paints to use, how to properly mask unpainted areas, how to deal with lead paint, how to protect your furniture and flooring and much more.
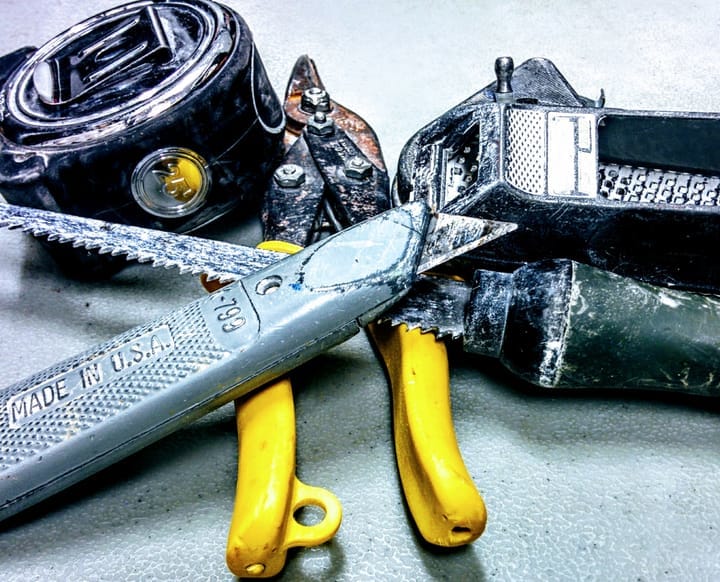
  • The Best Equipment

Unlike most DIY painters, a professional painter will have all of the tools they need to do the job well without interruption.  He or she won’t have to leave the job site to run to the hardware store because of forgotten tarps or paint rollers.  In addition, they’ll have the highest-quality equipment on hand that they are experienced in using.

How to properly inspect an interior paint job:

• Turn on all the lights in the room. Ideally, you want to do your orientation on a sunny day or high overcast, but this is Vancouver and that is not always possible. If you don’t have the advantage of natural light, you just have to be that much more diligent in your inspection. I bring a light with me when I do my paint inspections.

• Start on one side and work your way around a room. Run you hand over walls and make sure they are smooth. Walls should be sanded between coats and they shouldn’t feel rough or have noticeable bits or lint in the paint.

• Check for major and minor marks on the walls. There shouldn’t be any holes, dents, paint drips, or marks on the walls. I always look for staple marks along the top one to two feet from the ceiling. This is where the drywaller stapled plastic to protect walls when the ceilings were textured and can often be missed by the painter when prepping the walls, since they are above eye level.

• Cut lines should be straight. Check along ceilings, around trim and especially anywhere there is a colour change. Those lines should be straight and smooth.

• Look for paint on the ceiling. I can’t tell you how much this bugs me. It is a mark of an amateur painter or a careless one. The same goes for plugs, light stitches, and baseboard heaters. These should all be paint free.

• Check window and door frames and trim. They should be caulked all the way around, including underneath the windowsill, and painted. Nail holes should be filled and sanded before they are painted. Door and window trim should be smooth. Window frames should also be paint free.

• Caulking should always be done before painting. I’ve seen paint jobs where a painter hid his wavy cut lines by caulking afterward. We were hired to repaint the house when all the caulking started to discolour.

• Check windows for paint drops and spittle on both the inside and outside of the glass. While you are standing at the window, this is a good time to check out some of the exterior painting. Make sure there are no paint drips on the roof and that the inside of fascia boards you can see from the window are painted.

Top Painter Skills

If you are interviewing for a job, make sure you can address these topics. There is a strong likelihood that one or all of these topics will be discussed. And, if you a looking for a career path, do a self-check to see if these skills are, or can be, among your strengths.

Communication Skills

To serve a client’s needs, you must understand what the client wants. Unfortunately, many people do not know how to explain what they want clearly, so you will have to be able to either draw out more exact instructions or use your judgment to fill in the details. Remember that good communication means hearing and respecting what the client wants, not what you think they should want. You can make suggestions, but the owner of the property always has the final say.

Aesthetic Sense

Most clients will need you to make at least some judgment calls in your work, and some will directly ask you for advice. You need a strong sense of what looks good. Think of the job site as a work of art.

Detail-Oriented

What makes a good, or even a great paint job is in the details, such as crisp, clean edges, even coats, and well-adhered layers. A small error can subtly but meaningfully alter the look of the room or building.

Tips To Find Good Colour For Interior Painting

How to Choose Interior Paint Colors

Choosing the right interior paint colors depends on the kind of room you want. Take some time to think about what kind of ambiance you want. Certain colors add weight to the room while others create a lighter tone. You can also mix colors into different shades and tints to help create more visual unity. Plan out your rooms before painting so that you can make your home’s interior pleasant no matter what colors you use.

Paint with warm colors to create comfortable, energizing rooms. Warm colors include red, orange, and yellow. The brightest tints of these colors are bold and vibrant but can be too strong when used often. More muted shades can make a room feel cozier, similar to a summer or autumn day. Warm colors work well in rooms that feature a lot of activity, such as living rooms

Choose cool colors to make a room relaxing. Blue, green, and purple are all cool colors. Cool colors can freshen up a room or help you calm down after a long day. They make for good choices in bedrooms and sitting rooms. Lighter shades can feel more vibrant, while darker shades can feel more soothing

Select neutral colors to balance out other colors. At first glance, the various shades of white and gray seem boring. In decorating, they are very useful because they fit well in any color palette. They tone down warm or light colors, but they also lighten cool or dark colors. Black, brown, and light blue are a few alternative colors that can serve as a neutral base

Opt for lighter tints in order to open up rooms. Pale yellows, blues, and whites are great choices to lighten up a room. Light colors lack visual weight, which means your eye isn’t drawn to them. When you step into the room, your eye may go to a piece of art or another bright feature. Since you aren’t focused on the exterior surfaces, rooms with light colors often feel larger than they are

How to Choose the Right Paint Color for Every Room

Feeling in the mood for a revamp? Painting a room or a single wall in your home is a simple DIY that promises to have a major impact in any space. When it comes to taking on a home renovation project, doing your due diligence is a must. From sampling chips to evaluating natural light, there are a number of essential dos and don’ts you should consider before you even walk into a paint shop

Take Note of Permanent Features

Before you even lift a paint palette, look around your home and take inventory of the permanent features of your home. Do you have dark stained-wood floors, exposed beams, or a brick fireplace? Are you planning to make any permanent changes in the near future? The hue and tone of all these elements should be strongly considered before you move forward with your design.

Don’t Start With Painting

It’s okay to walk into your design process knowing that you want pops of color, but choosing your paint color should be the last step in your design process. First, find inspiration for your room—be it in a family painting or a textile you love. Select your fabrics, furniture, and major accents first, and then consider how they all come together. Is there a hint of yellow in your botanical-print fabric that you want to pull out? Is your stained-wood table darker than you realise? It’ll be too late to chime in on these details if painting was your first step.

Get to Know the Colour Wheel

To find colors that complement your chosen fabrics, finishes, and furniture, use a colour wheel. The expression “opposites attract” is as true in colour as it is in relationships: Hues opposite each other on the color wheel are complementary. So blue complements orange and red-orange complements blue-green

Test Paints Before Committing

If you’re seeing chartreuse everywhere lately, that’s a good sign it’s a colour that’s on its way out. Though your walls can be repainted, it’s not something you’ll want to do once a year. So if you’re lusting after an on-trend color, use that in your accents and select a wall paint that’s more timeless and/or subtle.

How to Choose a Paint Color

With the vast array of color choices available today, it can be hard to know where to begin. And if you’re like many homeowners, you want to make sure you’re not only choosing the right colors, but also colors that will coordinate from room-to-room, or from interior to exterior. The good news is that there are many easy resources available to help you create your personal palette with confidence.

Consider these ideas to transform your home:

For a smooth transition between spaces, try choosing a color for one room and paint the adjacent space two shades away, lighter or darker, using tones from the same color chip.

It doesn’t take much color to punch up a space. Create a feature wall with a contrasting or complimentary color. A nook, window bay or the wall behind your headboard can be great candidates for feature walls

Wake up beige. Adding shades of the same color creates depth and interest. Paint below the chair rail a deeper shade of the existing wall. Choose textured curtains from the same color family.

HOW TO CHOOSE INTERIOR PAINT COLORS

As any homeowner knows, choosing paint colors can be overwhelming. Use the following guide to help you explore and select interior color schemes you’ll love!

While there is no one-size-fits-all reply to “what’s the best interior paint color,” some thoughtful research goes a long way. Go into this exercise with an open mind and a commitment to exploring your creative side as you search for your perfect paint color.

Analyze the Room for Interior Paint Ideas

Hardwood floors, countertops, a fireplace surround, area rugs, and of course furniture…the colors in these items will help determine which paint color families will work best in your room, and help narrow your options.

Explore the Best Interior Paint Colors–for You

If you want to cut to the chase, check out our tried and true most popular paint colors, where we highlight homeowner favorite colors including Chantilly Lace OC-65, Revere Pewter HC-172, Hale Navy HC-154 and many more.

Get Color Chips, then Test with Paint Samples

Once you’ve selected the colors you’re drawn to, visit your local Benjamin Moore retailer and pick up color chips and inspirational brochures to bring home.

How to choose the perfect interior paint color

Nothing refreshes the interior of your home like a new coat of paint. But painting is a lot of work, and, depending on the size of your home, it can be an expensive project. That’s why you need to carefully consider the paint color you choose before you get started.

The work involved in painting your interior will pay off if you’ve chosen the right colors. It’s tempting to pick your favorite color or a palette you find fashionable, but there’s more to consider than just shades that you like. Your paint should compliment your furniture, look sharp under any lighting and emphasize the parts of your house you want to highlight

Get inspired

Don’t step into a paint store and grab the first color that matches your rug. That comes later. In the beginning, you may not even know where to start. Let’s fix that

Check out blogs and boards: Your first step is to find some inspiration. Pinterest and other online idea boards are great places to see what others have done. This is a great way to see design concepts in practice and identify what you like and what you don’t. You never know what you’ll find.

Follow trends…to a point: Online pinboards and magazines can help you along, but don’t follow trends too strictly. The bolder, more drastic the trend, the less likely it is to stick around. Sure, a black and purple home may be in vogue now, but that could change in a matter of months. Remember, you want to enjoy your interior for a long time; trends don’t last forever.

Consider your focal points: Where do you want people to look when they step into a room? This is a key question you should ask yourself when choosing an interior color. If you have some wall art you are particularly proud of, choose a color that will emphasize that art. Choose wall colors that won’t wash out your fun furniture or pull focus from your fancy television.

Set the right mood

After you’ve seen what others are doing and gathered some ideas, it’s time to think about mood. Every room, whether you notice it or not, gives off a certain mood; colors create energetic or calm atmospheres.

How To Find The Perfect Drywall Repair Services

Basic Tool List for Minor Drywall Repairs

Need to repair damaged drywall in your home? Use our drywall tools list to get the job done right. It examines the six essential drywall tools you will need.

There’s more to drywall repair than just putting some joint compound on a wall and calling it a day. A drywall contractor has special tools that are used to get the compound smooth and perfectly blended with the wall. If you’re planning to do it yourself, these are the 6 essential drywall tools you will need. But consider the cost – if you purchase all these tools, will the return be worth the investment?

1. Hawks and mud pans

A hawk is a large square sheet of metal supported by a center handle. Mud pans resemble meatloaf pans and have crisp, sharp edges. These tools are used to carry the drywall compound with you while you work. Hawks are the tool of choice for professionals, so they tend to cost a little more. A mud pan will work nicely for occasional repairs.

2. Knife

Plaster repair requires the right kinds of knives. Putty knives range in size from two inches across to more than a foot. The size you need depends on how large a repair you are doing. Nail holes are easily patched with a narrow knife, but larger work over seams or big holes will require a wider blade.

3. Sandpaper

You cannot do a proper patch job with sandpaper. A sanding block is OK, but actual paper with a special hard sanding pad is better. If you will be working on higher areas, invest in a sanding board that you can put an extension on.

4. Sanding sponge

Sanding drywall produces a ton of dust. Small jobs can be finished with a sanding sponge. Used along with a bucket of water, the sponge will eliminate concerns about drywall dust. They should be used with care, however, to avoid removing too much of the compound.

5. Corner tools

Inside corner tools are perfect for finishing off the difficult area in the corner of a room. It will speed up the process of finishing a stretch of drywall. However, it’s not typically required for repairs around the house.

6. Tape

Large repairs, like cracks or seams, should be fixed using tape. The tape will prevent the crack from reappearing and can easily be blended in with the wall. Holes can be covered using special sheets of self-adhesive mesh.

Basic tools for cutting drywall

Drywall can be cut with a T square and utility knifeDrywall is easily cut using simply a drywall utility knife. The basic concept involves scoring through the paper on one side of the sheet of drywall and then bending the board until it breaks the interior gypsum material. You can read a step by step guide to cutting drywall here. You will also want to use a drywall T square as a straight edge as well as a measuring tape. There are of course other tools that allow you to cut drywall but these are the basics.

Basic tools for hanging drywall

Drywall can be installed over wooden studs using either nails or screws as fasteners. When installing drywall on steel studs you must use screws. Therefore you need at least a drywall hammer or an electric drill to install drywall. You can use a cordless drill but you have to be careful not to puncture the drywall paper when setting the screws.

Basic tools for taping and finishing drywall

Taping and finishing drywall patches is done with drywall finishing knives. Good quality taping knives can be purchased for around $12 to $18 each, and a good quality drywall mud pan can be found for around $15 to $20. Some people debate whether stainless steel knives are better than blue steel knives. It basically comes down to the trademan’s preference. On the other hand, stainless steel mud pans are always the best choice.

How to Patch a Medium Hole (anything smaller than six inches)

For a professional finish follow the instructions under Large hole. This method requires finesse to feather the joint compound into the rest of the wall – if not done correctly, you will see a slight bulge in the wall. You must feather the repair area (gradually reduce the thickness outward) when applying the joint compound and in the sanding stage. Use a drywall patch that is slightly larger than the hole that needs to be repaired. You can purchase these at your local hardware store. Look for a kit, which will include everything you need.

Materials: For this job you’ll need a drywall patch and joint compound.

  • Sand and clean the area around the hole where the patch will contact the wall.
  • Apply the adhesive side of the patch to the wall.
  • Cover the patch with a joint compound.
    • Use a crisscross pattern with your putty knife to apply the compound.
    • Apply enough compound to cover the patch and have enough to feather.
    • Once dry, lightly sand and apply another coat.
  • Sand the dry second coat with sandpaper.
    • Feather the edges to blend the repair into the wall.
  • Prime and paint.

Tips Proper Spackling Techniques

Before you start, here’s a brief lesson on spackle. Spackling paste or spackling compound is made of gypsum powder and binders and is used to patch small holes, cracks and other imperfections like dents in drywall, plaster walls, and sometimes in wood. It comes in powdered (mixed with water before application) or paste form, the paste form being the most commonly used and known. Actually, the word Spackle® itself is a registered trademark but it is commonly used to describe spackling compound. It is also sometimes used, erroneously, in reference to drywall joint compound, which is similar but an altogether different product. Joint compound is mostly used to cover joints between wallboard panels and to cover the fasteners and screws used to attach wallboard to studs underneath. It can be used like spackle, but it is better for repairing larger holes and damage that require backing or other reinforcement.

Step 1: Prepare the Spackling Spot,

Helpful Tips

  • Fine-grit sandpaper is good for smoothing down the surface around a hole if there are not too many fragments or a protruding outer edge. Just give it a couple of quick brushes with the sandpaper to smooth it down.
  • If you’re going to spackle over nails or screws that popped through your wall’s paint, use a nailset and hammer to push them in below the wall’s surface.
  • If you’re working on holes of 2″ or greater in diameter, you may need to purchase or make a wall-repair patch and apply it before using joint compound to seal it in place. See Patch and Repaint Walls.

Step 2: Apply Spackling Compound

Helpful Tips

  • Consider using two putty knives — one with a wide blade and one with a narrow blade. Dip the wide knife into the can of spackling compound and use it as a palette. The narrow knife can be used to apply the compound to the damaged area on the wall. You can also scrape excess compound from the narrow knife onto the edge of the wide knife for a cleaner, more controlled application.
  • Always close the spackling compound lid after you’ve taken out what you need. It dries quickly and can be ruined if left exposed to the air.

Step 3: Paint

Safety Alert!

Open the windows to make sure you’ll be priming and painting in a well-ventilated area.

Using Latex Caulk to Fill Small Drywall Cracks

To fill small cracks you need something that is liquid enough to penetrate the crack but drys to a finish that can be painted. The easiest material is a 100% latex caulk and this type of caulk just so happens to be the least expensive too. You will need to use a small rubber spatula to force the caulk into the crack.

First apply a bead to the crack then using a crosshatch pattern work the caulk into the crack. You don’t want to run along the crack or straight against it or you will pull caulk out of the crack rather then force it in.

After the caulk has had about 5 minutes to setup use a damp not wet paper towel and remove any excess caulk from around the crack without actually going over the crack its self.

Painted surfaces especially ones that have paint applied by a roller have a texture so it is important to remove the extra caulk the best you can so the texture will remain.

How To Paint Stucco Repairs The Right Way

Stucco Repair Contractors

Stucco is one kind of plaster coating that can be used both on the surface of the building inside or outside. It is actually a plaster of Portland cement. Stucco is such plaster that doesn’t need that much of maintenance. However, it is a very sustainable, cheaper, hard, fungal resistant and durable plaster you can ever have. Stucco plaster can be prepared by the mixtures of Portland cement, sand and water together. It can be applied through the automated machine or manually into the interior or exterior part of the building or wall.

Choosing the Right Stucco Repair Contractors

Whenever you face any problem with your stucco plaster, you can contact with any good stucco repair expert. They can suggest you the best way to fix any problem regarding stucco plaster. As a homeowner, you may face various type of problems with you stucco plaster. Improper application or coating of stucco plaster can cause rotting of wood under the coat, cracking, bubbling of paint, an infestation of insects and much more. You will be amazed that, the level of humidity within the home can also be increased for the damaged stucco plaster. So before you choose an expert stucco contractor, you should check the company where he has come from. Because, a good stucco repair company will definitely hire a good or a group of good stucco contractors. You also should check out the background profile of a contractor before you impose any repair work.

These are some basic listings you should definitely check before you choose any contractors to repair the stucco problem. Repairing stucco is an important job to do as fast as you face any problem. You must go to a contractor for immediate stucco installation, to repair stucco cracks, for stucco patch repair, stucco wall repair and much more. The stucco repair cost varies. The cost depends on the company or contractor you are willing to go for. Some companies or contractors can provide the best service at a lower cost.

So, before you choose any stucco repair contractor, you should check these certain things first. There are many stucco contractors in your area but you always have to choose the best one to get the best and reliable service.

Tips for Choosing the Right Stucco Contractor

Whenever you’re in need of a stucco contractor, whether it’s for stucco repair or you need completely new siding for your home, you should choose your contractor carefully. It’s important to take the time to research contractors and filter through them or you could end up receiving sub-par service. This could result in you having to hire a second contractor to fix what the original one had done. So, before you hire a stucco contractor for your project, be sure that you are taking the necessary steps.

RESEARCH MULTIPLE CONTRACTORS

The first thing to avoid is hiring the first stucco contractor that pops up in a Google search. While you may end up actually hiring that contractor, you still want to research a handful of different companies before making a decision. The main thing you should look for is a company that specializes in stucco. General contractors may offer stucco services, but a contractor that specifically specializes in stucco will deliver the high-quality results you want.

ASK FOR BIDS

Before you make a decision about which contractor you’re going to hire, you’ll want to ask at least a handful of them to send you bids for the project. This will allow you to compare prices, experience, and estimated project timelines of each contractor. Remember, the cheapest price is not always the best option. Take a look at each bid carefully and try to narrow your choices down to two or three contractors.

ACQUIRE REFERENCES

Once you have your choices narrowed down, you should ask each of the remaining contractors for a list of references. The only way to truly know how well a contractor will do the job is by seeking advice from previous customers. Ask each of the references how their projects were handled from start to finish. They will be able to tell you how the contractor communicates throughout the project and how friendly or accommodating they were. At this point, you should be able to select the contractor that you would be most comfortable working with.

ASK ABOUT THE PROCESS

Once you’ve chosen the stucco contractor for your project, you should ask what the process will be like from start to finish. This means asking when they will begin and end their work on a daily basis. You may also want to ask about what happens when the project is complete. Most stucco contractors will ensure your property is left exactly how they found it but be sure to ask how your contractor plans to clean up after the work has been completed. You may be told that a dumpster will need to be placed in your driveway throughout the project. This will be something you and your family need to plan around. It is strongly recommended that you get the entire scope of the project in writing. This is good for both parties so there is no confusion about any phase of the stucco installation or repair.

Stucco Contractors : How to Choose the Right One

Whether you need specific stucco repair or your entire house exterior needs a facelift, you’ll probably find yourself looking to hire a stucco contractor. Being that this is an issue most people only encounter once or twice in a lifetime, if at all, you most likely don’t have the phone number for one handy. You may ask a friend or coworker if they know anyone, but you shouldn’t hire someone on a whim. As with most things, you want to evaluate your options to ensure you’re hiring the right stucco contractor for your needs.

RESEARCH MORE THAN ONE STUCCO CONTRACTOR

Don’t just do a google search and pick the first name that comes up, or the one closest to you. While these may, in fact, be the ones you ultimately choose, it’s wise to compare and contrast several different contractors.

In addition, be sure that you’re looking specifically for a stucco contractor, and not a general home improvement contractor. While the latter may be able to get the job done, a contractor specializing specifically in stucco will be more qualified to handle the project. They’ll have a wider knowledge base in this specific area, especially concerning products or possible problems.

CONTACT FOR MORE INFORMATION

Once you’ve narrowed down your options to two or three contractors, it’s not a bad idea to reach out them for further information. Most contracting companies encourage potential customers to contact them if the customers are interested in hiring for a job, or have questions. You can inquire more about specific materials used, whether or not they sub-contract the work, if they get their supplies direct from the manufacturer, etc.

GET AN ESTIMATE, AND THEN SOME

You want to get an estimate from your stucco contractor, but consider going a little further than that. Ask when they can start the work, and how long they think it will take. Your stucco contractor probably won’t be able to begin work right away, but they should be organized enough to give you an idea of the start date.

Invest Some Time When Choosing a Stucco Contractor

When a home improvement project requires a stucco contractor, most homeowners will likely not have the names and phone numbers of any installers stored in their computer, smartphone, or address book.  Since the need for a stucco contractor may be a once-in-a-lifetime circumstance, the first reaction of a homeowner might be to ask a friend or a family member if they or someone they know could recommend a reputable company

While this could provide a viable lead, it will in all likelihood merely scratch the surface of what will be needed to make a comfortable and informed decision on the contractor who will ultimately be awarded the project.  In other words, it would be prudent to invest some time in doing research, or homework, before settling on a stucco contractor – and while there are indeed several stucco companies to choose from in Toronto and the GTA, homeowner diligence upfront will pay dividends in the long run from the standpoint of return on investment.

First and foremost, it is suggested that homeowners obtain a minimum of three written estimates from various stucco companies – this is no different than shopping around for a new roof, interior/exterior painting, or kitchen renovations.  While this may seem like a somewhat tedious process, it is an important element in making an informed decision on how the money will be invested – and should any contractors hesitate or outright refuse to provide a written quote, this should be a ‘red flag’ to direct research time elsewhere.

Stucco installations represent a substantial financial investment, and choosing the right stucco contractor is vital to achieving both the desired look and the best return on that investment. Therefore, dedicating an appropriate amount of time for research/homework before making a final decision would also be a wise investment.

Ready to Answer All of Your Questions

A reputable stucco company, such as Canadian Stucco, should basically anticipate that potential customers will want and need to know this type of information and be willing to respond openly and honestly.

HOW TO CHOOSE THE BEST STUCCO COLOR FOR YOUR HOME

It’s all about curb appeal

whether you’re adding stucco to your home’s exterior or changing the color of old stucco, the color you choose can affect your home’s curb appeal. Much like picking a stucco texture, choosing the right stucco color for your home can be a little overwhelming. If you’re worried about picking the wrong stucco color for your house or are having trouble visualizing how your home will look with the color scheme you’re considering, then this article is here to help you.

Getting Started

When choosing the best stucco color for your home or building, it is probably a good idea to first purchase some samples and do a comparison board. Sure, this may seem like overkill, but wouldn’t you rather find out that hot pink color you fell in love with isn’t going to look so good on your home before your stucco contractor installs 2,000 square feet of it?

Ideally, you should use the same material for your sample board that will actually be on the exterior of the house, because the color will often vary a bit depending on what it is being applied to. Once you have your sample board, take it to the building site and figure out which stucco color looks best against that particular environmental backdrop.

Stucco Basics

Stucco base coats are usually a cement-based, plaster-like compound that goes on the outside of your home. Whether you’re using a “one-coat” (which usually is actually a two-coat) or a three-coat stucco system, the final coat is called the finish coat. The finish coat can be cement or acrylic based (I recommend acrylic because of its flexibility). You can purchase a stucco finish coat that already has the color mixed in it, or you can pick a color and paint it later (I recommend getting it pre-mixed for a more uniform look).

Location, Location, Location

You ever hear the phrase, “location, location, location” when it comes to real estate? Well, the location of your home is often important when determining the best choice of exterior stucco color, as well.