A Landlord’s Guide to White-Glove Cleaning After Move-Out
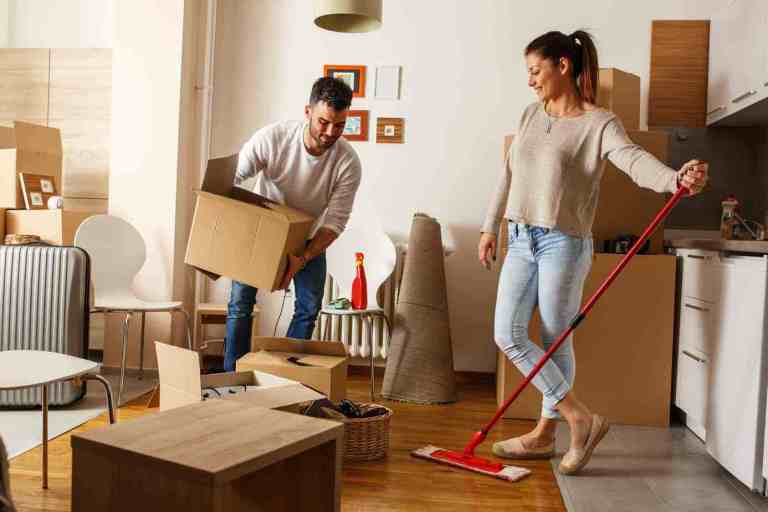
After the tenant moves out, you hope that everything’s been perfectly cleaned, and you won’t need to lift a finger. Unfortunately, that’s usually not the case. As a landlord, most of the time you’ll need to go in after the tenant has moved out, and clean a little deeper before the next tenant arrives.
Generally, this type of cleaning is known as white-glove, which refers to an extreme cleaning wherein“immaculate” and “spotless” are the standard. It means cleaning all of the spots off of the blinds, wiping baseboards until they shine, and even polishing the individual slats of the air vents.
When your new tenants arrive, they want to see a clean space, and if you want to make a good first impression, you’ll give it to them. If you’re not sure how to clean to the white-glove standard, use this guide to get you started.
Gather Cleaning Supplies
Begin by gathering the necessary cleaning supplies. This is the most important step in cleaning success. It’s much easier if you have the right types of materials and tools with which to begin
Here are a few supplies you’ll want to collect:
Vinegar: This acidic mixture will be your best friend during white-glove. It has some surprising uses, including removing hard water deposits.
Rubbing Alcohol: Cleaners usually leave a residue. Even if you can’t see it looking straight on, if you look at a shiny surface from a different angle, you can usually see streak marks. Rubbing alcohol will remove all of the extra streaks and residue for a perfectly clean shine.
Magic Eraser: This little gem has so many uses, from cleaning baseboards to removing grime in the tub. It really is magic when it comes to removing stubborn marks and stains. Just be careful about using it on walls because it’ll take the paint off if you rub too hard!
Brushes: You’ll want an assortment of brushes to get into the nooks and crannies. A pack of toothbrushes from the dollar store should do the trick. Q-tips are also excellent for cleaning miniscule corners.
Microfiber Cloths: Microfiber can clean, dust, and polish without soaking up too much of the chemicals. You won’t need to switch out your cleaning rags as often, and you can use less product to get the job done. A microfiber cloth takes the place of a duster and a polishing cloth as well.
Dryer Sheets: It may seem like an odd tip, but dryer sheets are perfect for dusting off baseboards and blinds.
Cleaner Varieties: You’ll also want a variety of cleaners, starting with all-purpose, which are good for almost any surface. You can make your own by mixing three parts water, one part vinegar, and a few drops of dish soap. For the bathroom, look into getting an abrasive cleaner, such as Comet, to clean the porcelain on the tub and toilet.
Oven Cleaner: A good quality oven cleaner (avoid dollar store brands) left to soak overnight in your oven will remove the bulk of cooked-on messes. Make sure you get the kind that’s fume free!
Pumice Stone: Grab one to clean the stubborn ring in the toilet and another for the stuck-on grease spots in the oven.

Here’s your Move Out Cleaning Checklist
Why do I need a “move out cleaning checklist?” Well, moving can be a massive ordeal between packing and organizing, and of course the actual transporting of your belongings from your old to your new home. Aside from making your deadline, there is also the task of cleaning your apartment before you leave for good.
The expenses of moving can also add up quickly, so being able to earn your cleaning deposit back can be a huge help financially. No one wants to say goodbye to the money they put down when they started renting, but taking the time and putting in the work to completely clean your apartment can seem overwhelming during a move.
Room By Room
Go through your apartment and tackle chores room by room. An orderly method will keep you from overlooking any of the items on your move out cleaning checklist. Staying focused and organized and following your list will help you finish cleaning on time. And, it will get your deposit returned.
Bathroom
Cleaning the bathroom is likely not a favorite job, but you’ll need to make sure it’s sparkling clean before you move out.
Clean shower thoroughly. Remove soap scum from the grout, shower door, tiles.
Make sure all of your drawers are empty and clean by vacuuming them out and wiping them down
Wipe down the mirrors
Clean your toilet including around the base
Countertops, sinks, and floor should all be cleaned
Kitchen
The kitchen is potentially one of the most used areas in your home, so cleaning it might take a little more time. Don’t worry, following your checklist will keep you on the right track.
All cabinets and drawers should be emptied and cleaned out
Wipe down fronts of cabinets
Don’t forget to clean out appliances: the oven, refrigerator, and dishwasher need to scrubbing
Make sure the sink and countertops are cleaned well and disinfected
Sweep and mop the floors, including behind appliances.
Cleaning the house before moving out – why is it important?
The importance of cleaning everything before moving out is double-fold. So, you will relocate clean items, and you will leave behind a clean house for someone else to move in. Of course, if you are selling or renting your previous place of residence, having it clean will attract more buyers or tenants. Likewise, you can only move electronics safely if you clean them first. So, here is more about the general importance when this is concerned:
You cannot relocate dirty items. This goes against every relocation policy ever. Moreover, most long distance movers offers will not accept to relocate dirty items. So, if you have planned to relocate with a moving company, you will need to meet their standards first. Apart from being unhygienic, dirty items can “spread” dirt onto your new items, so you will have more to clean once you unpack. For this reason, it is really important to clean everything before moving out.
You need to clean your home before you move out. Moving and relocation are not the cleanest of processes. If you are moving on a rainy day, for example, you can count on making your floors dirty, as well as some other items due to the mud. So, you will need to clean everything before heading out. Imagine leaving a large pile of mud to dry up in your hallway? This is one of the worst ideas ever. Thus, make sure that you clean everything before you move out. It will be for the greater good.
How should you clean everything?
When it comes to your items, the process is really simple and you would not even need to include it in your week-by-week moving guide. However, for most other items, you might need a good strategy. Here is how you should approach the entire process:
Clean all items before you place them inside moving boxes. Start with a room-by-room packing/cleaning. Simply clean the room you are not using and clean all the items inside. However, make sure that you clean/pack all of the items before you proceed with cleaning the entire room. That way, you will simply clean after your packing. A really good idea, right?
Clean the kitchen/bathroom last. You should both pack and clean the rooms you will be using a lot last. Imagine if the first thing you pack is your bed. Where will you sleep? So, you should make sure that you leave the “most useful” rooms last. The same goes for the bathroom, make sure to clean it last.
Cleaning the house before moving out – some other useful tips
There are countless tips and tricks when it comes to cleaning and it does not matter if you are relocating – you will use all of them. Here are the most useful ones:
Plan everything in advance. You cannot simply decide that you wish to relocate one day and start packing and cleaning everything the next day. This simply does not work that way. Thus, you will need to make a really good moving-day plan and you will also need to stick to it. The more you plan, the better it will be for your relocation in general. This being said, you should make sure to ask for help whenever you need it for your relocation. It is simply one of the best options you can have.
Get a lot of cleaning supplies. If you think that you have enough cleaning supplies for your entire house, well, you are wrong. You will need to double the amount of that, and it is the bare minimum. Cleaning an entire room properly will take you at least two bottles of spray. So, make sure that you have enough ready at hand. The more you have, the better. After all, you will not throw anything away.
Move-Out Cleaning Checklist – Complete guide for apartments and houses
Kitchen Cleaning Checklist
One of the hardest areas to clean when moving out is the kitchen. To get started, empty all cabinets and wipe them to get rid of grease stains and dust. After removing the liners, replace them with quality and sturdy ones. For countertops, wash them with soap and warm water to reduce mold, bacteria, grime, and other residues. For glass cases, tabletops, doors, and windows, always take advantage of a specialized cleaning solution to restore its original appearance.
After that, it’s time to scrub the faucets and sinks. Chlorine-free bleach and powdered cleaning solutions are among the best products you could use. If you want an eco-friendlier cleaning solution, use lemon, salt, and ice cubes to lessen any unpleasant odors and other accumulated grime.
When you’re done with cabinets and countertops, the appliances are next on our checklist. For the refrigerator, it’s important to empty and defrost it. While defrosting it, place a large bowl to gather all the water. After defrosting it, you should start wipin the shelves, place a container with baking soda to get rid of possible bad odors. Set the fridge on a low setting and leave the door open to avoid mold growth.
After finishing with the refrigerator, it’s time to clean the stove. Start by removing the grills, drip pans. When scrubbing them, use warm water with a little bit of soap. To clean the oven racks, you can use steel wool to scrub the grease. Be sure to wear thick gloves and other protective gear to avoid respiratory and skin problems.
Bathrooms Cleaning Checklist
Since you’re done cleaning the kitchen, the bathroom will be the next on the checklist. Every bathroom consists of different elements such as tiles, tub and shower, sinks, toilet, vents, floor, countertops, vanities, and medicine cabinets. Start from scrubbing the tiles and grout with warm water. You can use a tile cleaning solution to remove stains and give the tile a shiny look. Then, clean the showerhead, shower enclosure, tub fixtures, tub, and shower rod. When it comes to the sink, pay extra attention to the chromed surfaces, faucets, and handles. Make sure to use a toothbrush to get the stains and mold out of nooks and crannies.
Move Out Checklist
Set a Move Out Date & Provide Written Notice
Once you set your move out date, contact your Renewal Coordinator, who will walk you through the process of submitting your notice to vacate. Once your notice is submitted, we’ll schedule your Pre-Move Out Visit.
Submit a written notice to vacate at least 60 days before your lease end date (30 days for Seattle)
Complete the Notice to Vacate form provided by your Renewal Coordinator and include a signature on your notice for every resident on your lease
Do a General Deep Cleaning
Make sure your home looks like it did when you moved in. Our team made sure your home was clean from floor to ceiling and that your systems were in working order.
Kitchens – clean all surfaces, including cabinets, countertops, sinks, etc.
Bathrooms – clean all surfaces, including sinks, tubs, toilets, bathtub surrounds, etc.
Appliances – emptied, clean, and free of damage, such as broken parts
Ensure all personal property, furniture, and trash is removed from the home
If you have pets, please eliminate pet odors and repair damage caused by pets
Check and Clean Walls, Windows, and Floors
Walls, doors, and trim – Wipe down all surfaces and ensure they are undamaged. Any painting should be corner to corner or done by a professional. Improper painting or patching could cause a deposit deduction.
Carpet – Have the carpet professionally cleaned and confirm that all stains are removed. Please leave a copy of your receipt in the home.
Other flooring surfaces – Ensure that all other flooring (tile, laminate, wood, vinyl, etc.) is clean and free of any discoloration or residue.
Make sure all hardware is still in place and functional, including doorknobs, blinds, shower rods, door stops, towel bars, closet door guides, etc.
Maintain the Outside of Your Home
Driveways – Leave driveways and garages free of oil stains. If necessary, have your driveway power-washed.
Landscaping – Ensure the landscape is well-maintained:
Have the lawn mowed, edged, and weed controlled
Cover flower beds with mulch to protect from weeds
Don’t forget to trim trees (up to 10 feet high), hedges, and shrubs to be one foot away from the home
Pest Control – ensure pest control service has been scheduled within the last three months of residency.
Pools – If applicable, ensure that any pool alarms and provided equipment are still in place and functioning properly. Verify that all gates, pool fences, and other access points to the pool are closed.
Home Exterior – If your home had window screens at the start of your lease, make sure they’re in good condition. If you had a satellite dish mounted, please have it professionally removed.
Do A Final Check
On move out day, take a final walk through your home to make sure you’ve taken all your belongings and left the home clean and clear. Make sure you don’t leave behind any boxes, trash, paper, or other items.
Leave all garage remotes on the kitchen countertop
Install new HVAC air filters
Replace any light bulbs that are not working
Replace batteries in smoke detectors and Smart Home equipment, if needed
Ensure all personal property, furniture, and trash is removed from the home
Place your house keys in the lock box provided at your Pre-Move Out Visit